How to Make a Wooden Cross for Outside
I was so honored when my niece asked me back in December to make her a wedding cross. That gave me tons of time to plan and build this project. The ceremony was July 14th, 2018 and what a fabulous wedding. In this tutorial, I'll show you how to make a wedding cross. I'll document my steps so you can make your own wooden cross. Perhaps you have an upcoming wedding. Or you could make one for your church or your own yard.
If you'd rather see a video, check out the YouTube video I made on the wedding cross project.
Tools and Supplies (affiliate links included below):
Western Red Cedar Boards (or boards of your choice)
Handheld Circular Saw
Hand drill & 1/2 wood bit
DEWALT 12-Inch Double Bevel Sliding Compound Miter Saw
Speed Square Layout Tool
Angle Grinder (Optional)
1 inch chisel and hammer
3 inch wood screws (a box)
2 – 5 inch lag bolts
Dark Danish Oil (optional)
Costs of Materials: approx. $400
Total Time (no texture): 4 – 6 hours
Total Time (add texture): 12 – 14 hours
Difficulty: Beginner
Step 1 — Choose the wood
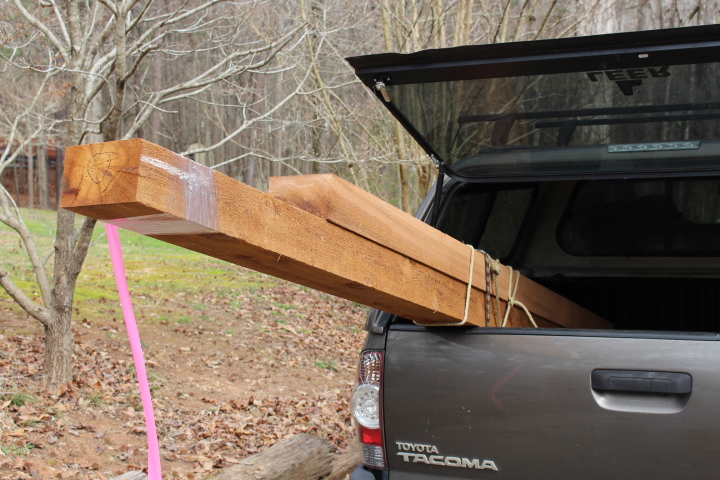
I used Western Red Cedar because it's lightweight, strong, and resistant to decay. And it's very easy to work.
You may have to special order western red cedar boards. Check with your local home improvement stores or building supply stores. You could also use another wood like pine.
Step 2 — Dimensions
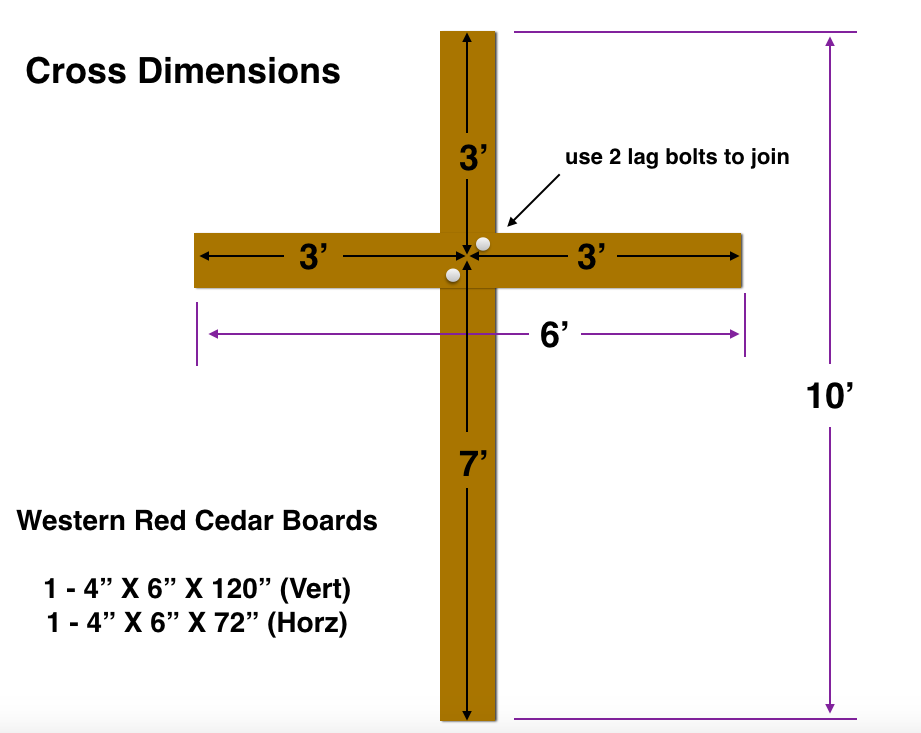
I used a 4″ X 6″ X 120″ board for the vertical beam. And a 4″ X 6″ X 72″ board for the horizontal beam.
You can also buy 6″ X 6″ beams, but the bigger the beams, the heavier the cross becomes.
This is a latin style cross, so pay attention to ratios. The top projection should be equal to the 2 horizontal projections. My ratios may not be perfect, but I think they look fine. I think the biggest goal is getting the 3 top projections equal length.
Click here to download the FREE wedding cross plans

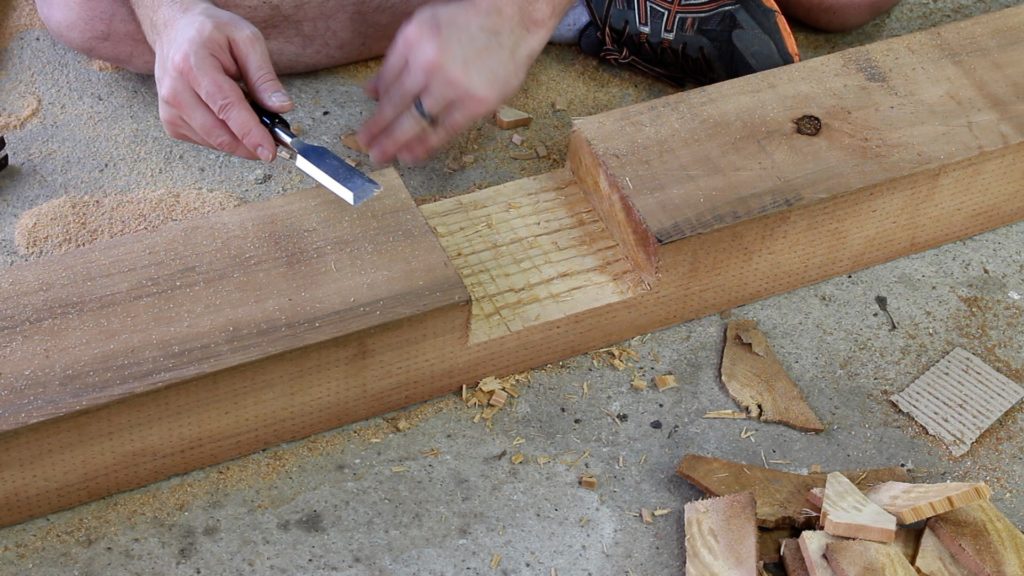
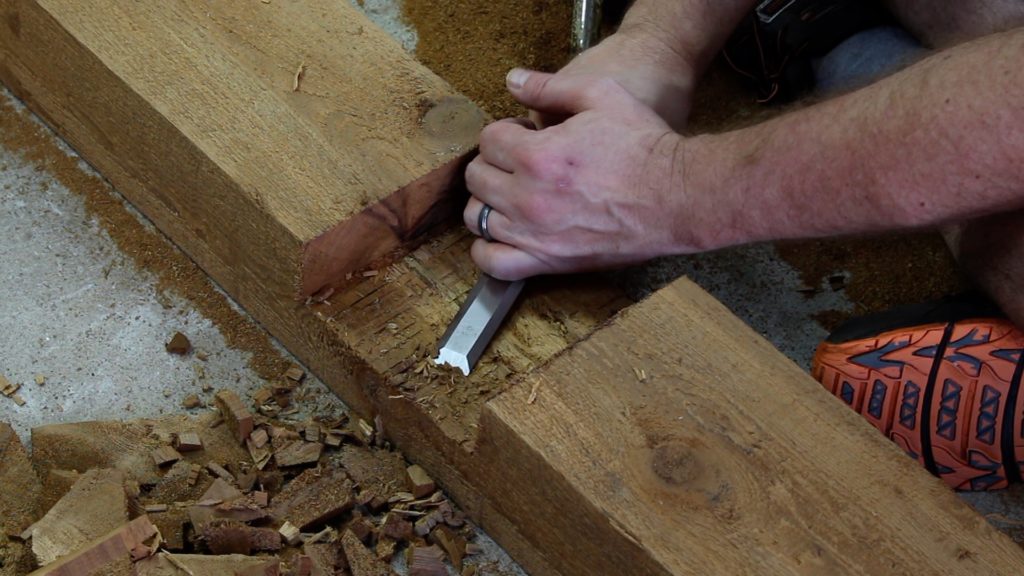
Step 3 – Cut the notches for the half-lap joint.
I used a half-lap joint to join the horizontal and vertical beams together. A handheld circular saw works well for cutting out the notches. Just adjust blade depth to 2 inches and make a series of cuts across the wood. Use a chisel to remove cuts and clean up the notch. Make an approximately 6″ wide by 2″ deep notch for both beams.
Use the actual width of the boards you buy which is why I say the notch should be approximately 6″ wide and 2″ deep. I laid one beam over the top of the other, and made my pencil marks. You might have to make some adjustments to get a perfect fit with the joint.
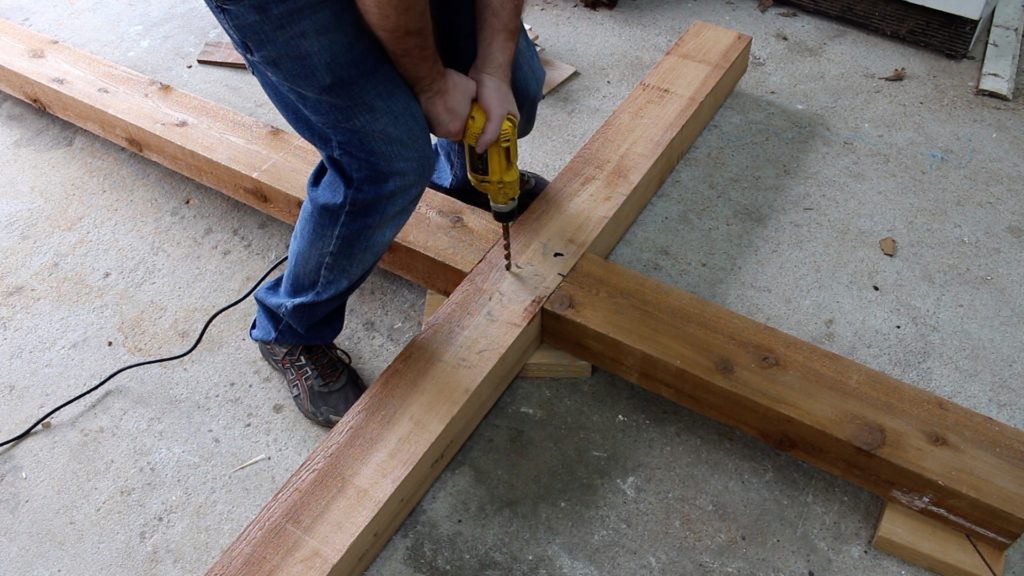
Step 4 – Drill holes for lag bolts.
Two 5 inch lag bolts were used to hold the beams together. Simply insert lag bolts into the hole and use a wrench to tighten the nuts on the other side. I put the head of the lag bolts on the front face of the cross. Using the lag bolts makes the cross easy to assemble and disassemble for transport. I don't recommend glue.
A corded drill works great for this. Use a 1/2 inch drill bit. You may have to ream the hole out some to make it accept the 1/2 diameter lag bolts. Two bolts are adequate to connect the beams together.
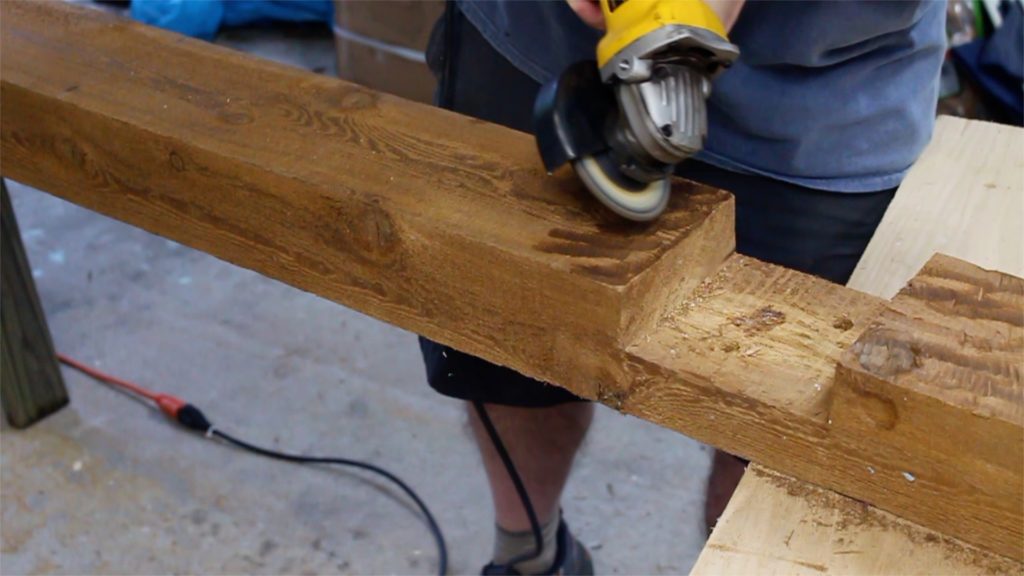
Step 5 – Sand or Add Texture (Optional)
You might decide to leave the wood alone and not sand or finish it.
I wanted my niece's cross to have a rugged look, so I used the angle grinder to add the rugged texture.
This took the most time for the whole project. Your hands will be tired after this. Please wear a dust mask!!
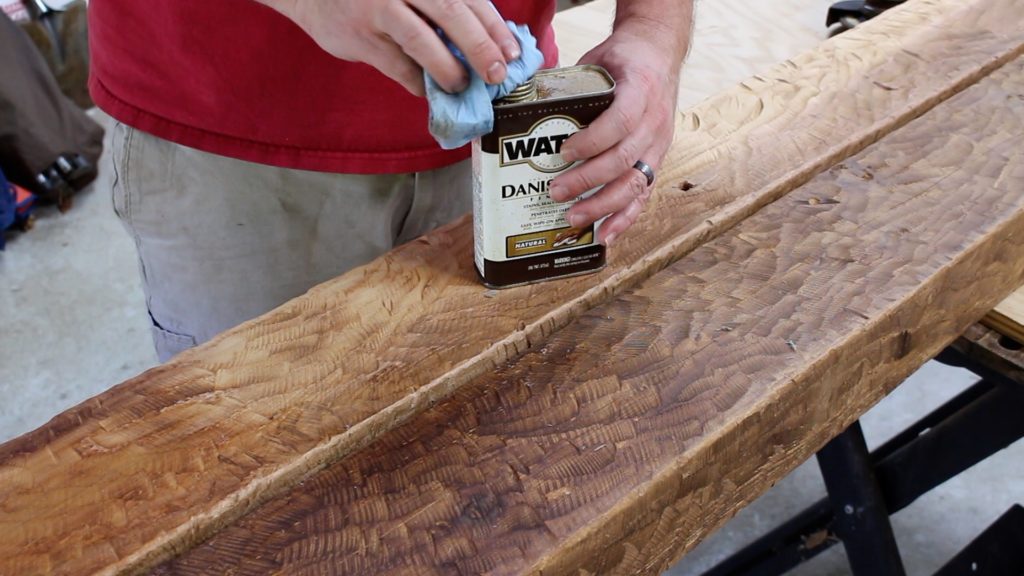
Step 6 — Add a finish (optional)
Adding a finish is really not necessary. Western red cedar will last a long time without any finish. However, I wanted my niece's cross to have a darker color. So, I added a dark Danish Oil to get this effect. One or two coats is plenty.
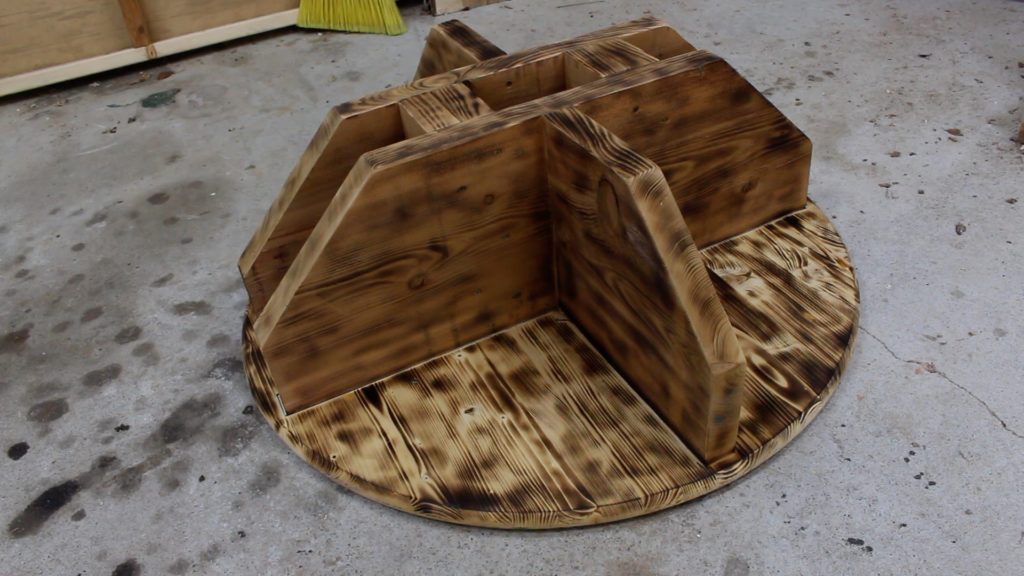
Step 7 — Build the base
Please refer to the FREE plans for details on building the base.
Click here to download the FREE wedding cross plans
I used western cedar for the base support pieces. The bottom is actually a table-top piece that I found at my local home improvement store. You could also buy a section of 1 inch or 3/4 inch plywood and cut out a circle or leave it squared. The cedar supports are fastened together with wood screws and then screwed to the base board.
My base is 3 feet in diameter, and it was very stable. Obviously, the wider the base, the more stable the cross. If the ceremony is outdoors, you might can get permission to set the cross in the ground. My niece's ceremony was indoors.
I highly recommend you set the cross up the day before the ceremony. And get another person to help you lift it and set it up. Make sure it's stable and won't tip over. You could take extra steps to anchor the base down or add sand bags to weigh it down. Use your own discretion for your particular situation.
Also, make sure the wedding ceremony room has adequate height for the cross. Coordinate with decorators if they want to add flowers or foliage to the cross.
I hope you enjoyed this tutorial. Please leave comments if you have any questions or suggestions. If you'd like to get more tutorials like this in your inbox, please subscribe to my newsletter. See the signup form below.
Are you starting up a new shop? Want to work safer in your shop? To help you answer these questions I've put together a 2-part checklist -- Home Shop Safety & Tool Checklist.
I will also send you updates of my latest woodworking and DIY projects. You can get all this by subscribing to my free email newsletter.
How to Make a Wooden Cross for Outside
Source: https://www.fouroakscrafts.com/how-to-make-a-wedding-cross/